

When it comes to digital image manipulation there are many applications that provide various possibilities to process images. But most often they do not offer exactly what I’m looking for. So finally I decided to implement my own tools to manipulate digital images.
An image can basically be regarded as a 2 dimensional array of pixels. These pixels are usually coded in RGB. That means in each pixel there is an integer value for the colour red, one for the colour green and one for blue. But for the mathematical treatment I consider a binary image that just has some grey scaled pixels.
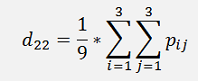
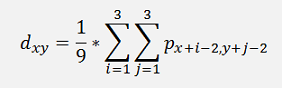
To smoothen such an image we can in a simplest approach just take the surrounding pixels pij of one pixel pxy and set this center pixel pxy to the mean of all the surrounding pixels plus the center pixel itself.
For these 9 pixels that would mean
This must be done for all pixels (except for the border pixels. These can be left
 )
)
If the smoothing function is written as a matrix..
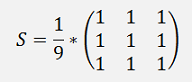
The operation to process the pixels with this filter can be regarded as a 2 dimensional convolution:
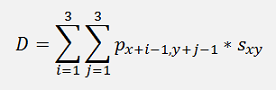
In a short C# sequence that would look like:
int x, y, i, j;
double R, G, B;
Bitmap bmpDest = new Bitmap(pictureBox2.Image);
for (x = 1; x < bmpSource.Width - 1; x++)
{
for (y = 1; y < bmpSource.Height - 1; y++)
{
R = 0;
G = 0;
B = 0;
for (i = 0; i < order; i++)
{
for (j = 0; j < order; j++)
{
Color pix = bmpSource.GetPixel(x - 1 + i, y - 1 + j);
R += (pix.R * s[i, j]);
G += (pix.G * s[i, j]);
B += (pix.B * s[i, j]);
}
}
if (R < 0)
R = 0;
else
{
if (R > 255)
R = 255;
}
if (G < 0)
G = 0;
else
{
if (G > 255)
G = 255;
}
if (B < 0)
B = 0;
else
{
if (B > 255)
B = 255;
}
Color newPix = Color.FromArgb((int)(255 - R), (int)(255 - G), (int)(255 - B));
bmpDest.SetPixel(x, y, newPix);
}
}
With the filter matrix.
double[,] s = {
{
1.0/9.0, 1.0/9.0, 1.0/9.0 },
{ 1.0/9.0, 1.0/9.0, 1.0/9.0 },
{ 1.0/9.0, 1.0/9.0, 1.0/9.0 } };
{ 1.0/9.0, 1.0/9.0, 1.0/9.0 } };
Of course this filter must be applied to all 3 colours R, G and B and the computed pixels must be limited to the range between 0 to 255.
If this smoothing operation is applied to the moon on the left side below
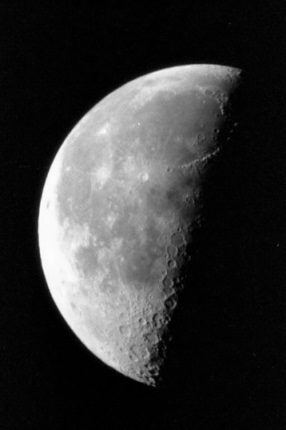

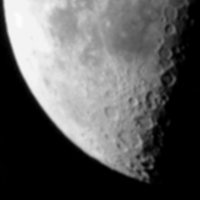
We get the output on the right side. There is not too much change to be seen, but if we zoom out to lower part, the right side is a bit blurred. That’s the result of the smoothing

The smoothing becomes a little better if a Gauss low pass filter is applied. This low pass filter is defined as
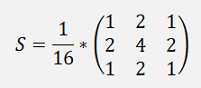
It uses a kind of weight function. The closer the pixel the more it is weighted. With this the smoothed moon becomes:
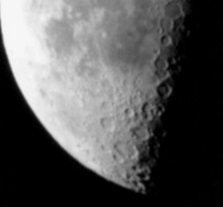
The image is a little less blurred.
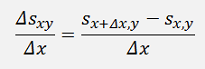
The opposite of smoothing is sharpening. Therefore the second derivation of the pixel colour sequence is built and subtracted from the original sequence. The first derivation with respect to x is
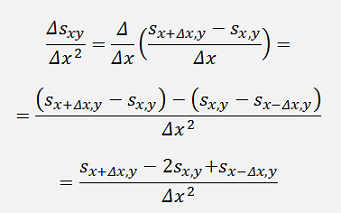
And the second derivation:
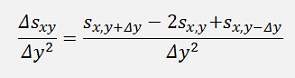
For the second derivation with respect to y it’s the similar approach and becomes:
With these the derivation for both directions is:
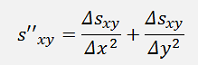
And as Δx = Δy = 1 pixel

Or in matrix form:
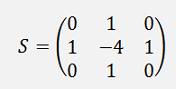
This matrix is the so called Laplace filter (the deviation see Discrete Laplace operator - Wikipedia).
If there is an edge on a image, that could be the change from a small value to a big value in a colour like:
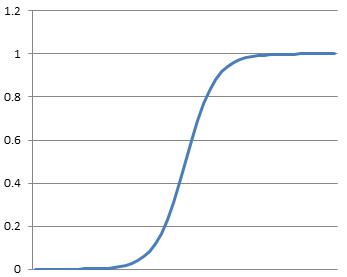
The first derivation of this is
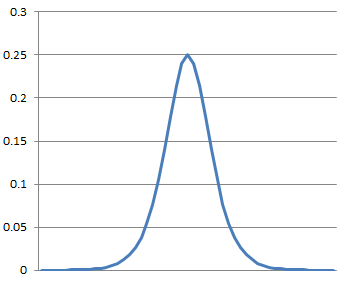
And the second derivation would be somewhat like:
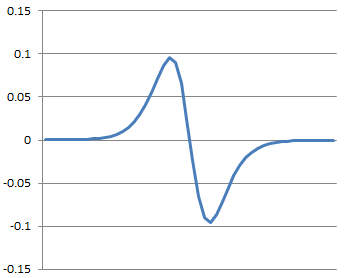
To sharpen the edge we have to subtract the second derivation from the original shape of the edge. That would become like:
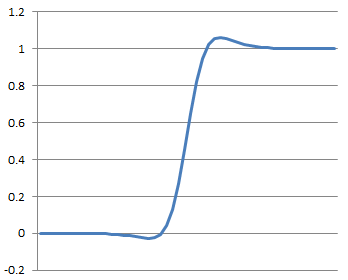
The change becomes steeper and sharper.
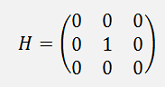
Now we have to create a matrix form that just copies the original picture. That’s quite simple:
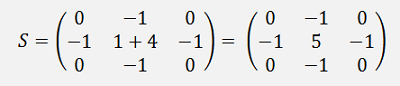
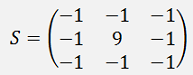
and the final filter to sharpen edges the second derivation subtracted from this matrix:
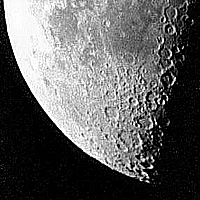
With this filter the moon becomes:

The kraters become a bit sharper.
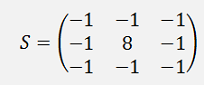
Some say the Laplace filter is quite sensitive for noise and recommend a filter like
And with the original image included:
That creates the following sharpened image:
A bit too sharp in my opinion
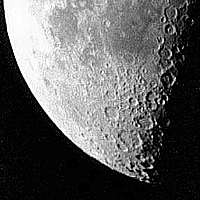
That can be improved slightly by reducing the values in the filter like:
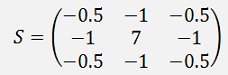
This is like reducing the amplification of the filter and shows a little smoother output:
Basically it is possible to play around with the values in all the filters. That changes their output quite a bit
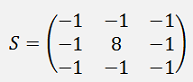
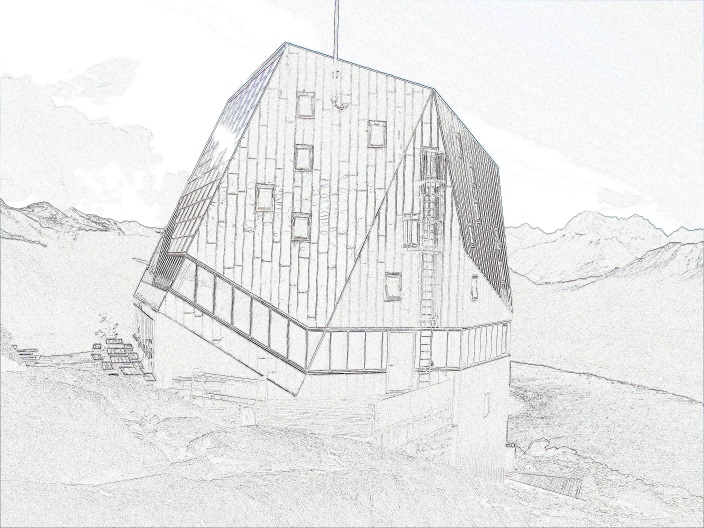
Another interesting possibility of the Laplace filter, if it is used as is, is the possibility to highlight edges. If I apply the filter
Applied to a colour photography like the Monterosa hut
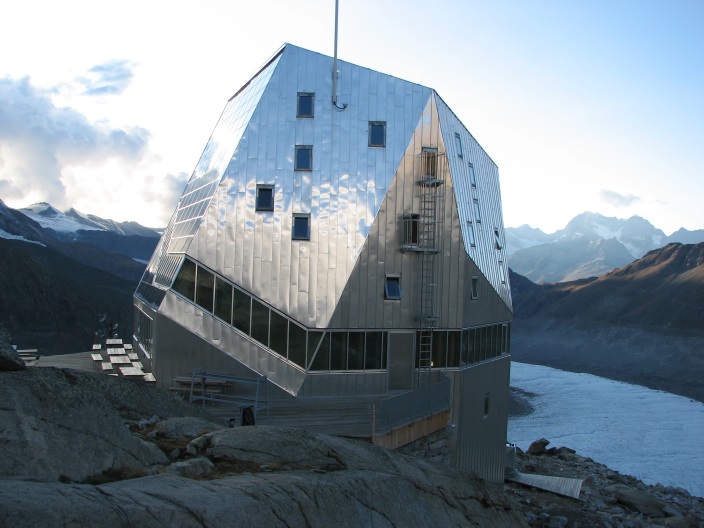
And inverting the colours. I get
Only the edges remain. But they are a bit too weak. To make them stronger we can just multiply each value of the Laplace filter by an amplification like
Then the image becomes:
But now there is still too much grey on the image. This can be removed by applying a threshold to the pixel colours and say if a pixel value is bigger than this threshold, we set it to 255 and otherwise we set it to 0.
With this the processing
private Bitmap ProcessImage(Bitmap bmpSource, double[,] s, int order, int threshold)
{
int x, y, i, j;
double R, G, B;
Bitmap bmpDest = new Bitmap(pictureBox2.Image);
for (x = 1; x < bmpSource.Width - 1; x++)
{
for (y = 1; y < bmpSource.Height - 1; y++)
{
R = 0;
G = 0;
B = 0;
for (i = 0; i < order; i++)
{
for (j = 0; j < order; j++)
{
Color pix = bmpSource.GetPixel(x - 1 + i, y - 1 + j);
R += (pix.R * s[i, j]);
G += (pix.G * s[i, j]);
B += (pix.B * s[i, j]);
}
}
if (R < 0)
R = 0;
else
{
if (R > 255)
R = 255;
}
if (G < 0)
G = 0;
else
{
if (G > 255)
G = 255;
}
if (B < 0)
B = 0;
else
{
if (B > 255)
B = 255;
}
if(Math.Sqrt(R*R + G*G + B*B) > threshold)
{
R = 255;
G = 255;
B = 255;
}
else
{
R = 0;
G = 0;
B = 0;
}
Color newPix = Color.FromArgb((int)(255 - R), (int)(255 - G), (int)(255 - B));
bmpDest.SetPixel(x, y, newPix);
}
}
return bmpDest;
}
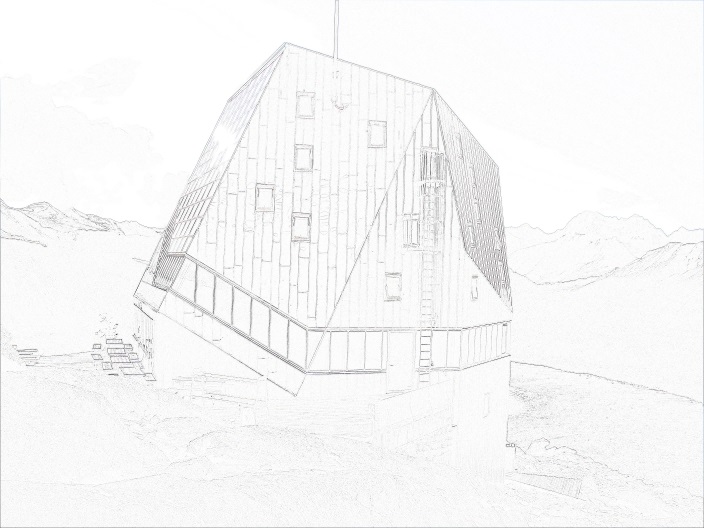
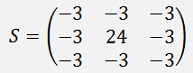
With threshold = 120 and
double[,] s = { { -3, -3, -3 },
{ -3, 24, -3 },
{ -3, -3, -3 } };
Creates the output:
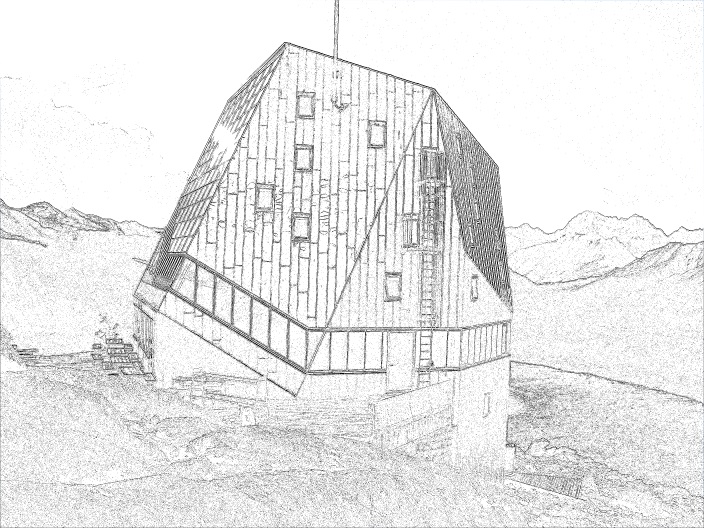
A perfect pencil drawing
With this kind of filtering it becomes easy to detect lines or curves or forms and subjects in the drawing.